Folding Camp Chair Cover!
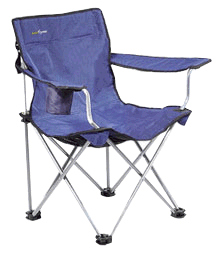
Step one: understand that this is not a permanent seating solution, but a quick fix until such time that you acquire a more appropriate chair. Also good for extra seating on occasions that family stops in for dinner and you don't want your mom to know you can't afford real furniture...until, of course, you acquire a real chair. If your chair is shaped differently, you can still apply these basic patterning principals to make a cover suited to your needs.
Step one: understand that this is not a permanent seating solution, but a quick fix until such time that you acquire a more appropriate chair. Also good for extra seating on occasions that family stops in for dinner and you don't want your mom to know you can't afford real furniture...until, of course, you acquire a real chair. If your chair is shaped differently, you can still apply these basic patterning principals to make a cover suited to your needs.
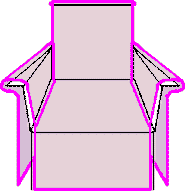
 Understand the bones of the chair. It isn't all 90-degree angles. This is a pin-and-fit pattern because so many chairs are made differently and are different sizes.
For best result, don't use horizontal stripes. Not only do they make you look fat, but it's a lot more noticeable when accidents happen. To add a little weight at the hem, use something heavy, like an upholstery fringe or trim.
You'll find your best results with a medium to heavy upholstery fabric.
The better the quality of fabric that you use, the better your chair cover will look.
Using measuring tape and chair to figure size, cut the lengths you need, with a few extra inches to allow for accidents and hems. Don't cut the width yet.
Lay the fabric over the chair, inside out. Use straight pins to mark where seams will be, lining up the grain of the fabric according to the floor hem.
Don't pin it too tightly. It's usually better to leave it fitting a little loosely, in the event you need to use it on a slightly larger chair and to prevent ripping during use.
You can always take in the seams if you need to.

Remove the fabric from the chair and stitch it together. Cut away excess fabric with a reasonable seam allowance. Serge or fold over your seams so they won't unravel.
The finished product is likely going into the washing machine several times during its lifespan, so you don't want the seams coming apart.
Another option is to use double-fold bias tape--but that's more expensive unless you make your own, in which case it's more work.

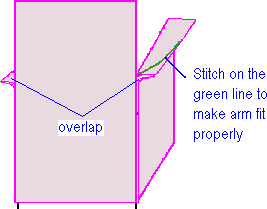
In the back, you'll have some extra overlap of fabric at the arm since the arm is shaped funny. Mark a seam and stitch on the green line so the arm will fit properly.


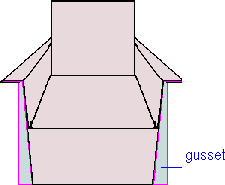
If you want a cover that's a little more tailored looking, you can tighten up your seams a little and add gussets. Now turn the cover right side out and try it on...On the chair, not you, silly!


When you do acquire your REAL chair, you can pass this cover on to someone who needs it--like the newcomer at his first event. Just make sure he knows it's a temporary fix!


